.png?width=46&height=30&name=Logo-symbol%20(1).png)
Summary
- Add an image to a course with the AI Assistant

- Manually add an image to a course or assessment
- Add areas to click on the image
- Activate and configure intro games
- Replace an existing image
- Frequently asked questions
Add an image to a course with the AI Assistant
To add an image with the AI Assistant, follow the steps below:
- Make sure you have completed the AI Assistant setup.
- Click "+" to open the add content bar.
- Select "Image"
 .
. - Click "Create with AI".
- You have two options:
- Enter a topic freely: type the topic you want;
- Or click "Use the training plan": choose a topic generated automatically from the course outline.
- Select the "Generate" button.
- An image bank is then offered: click the image you want to insert into your course.
- The image is added automatically.
A title and a description are added automatically.
Manually add an image to a course or assessment
To add a new image to a course or assessment, follow the steps below:
- Click "+" to open the add content bar.
- Select "Image" .
- Insert or drag and drop the desired image.
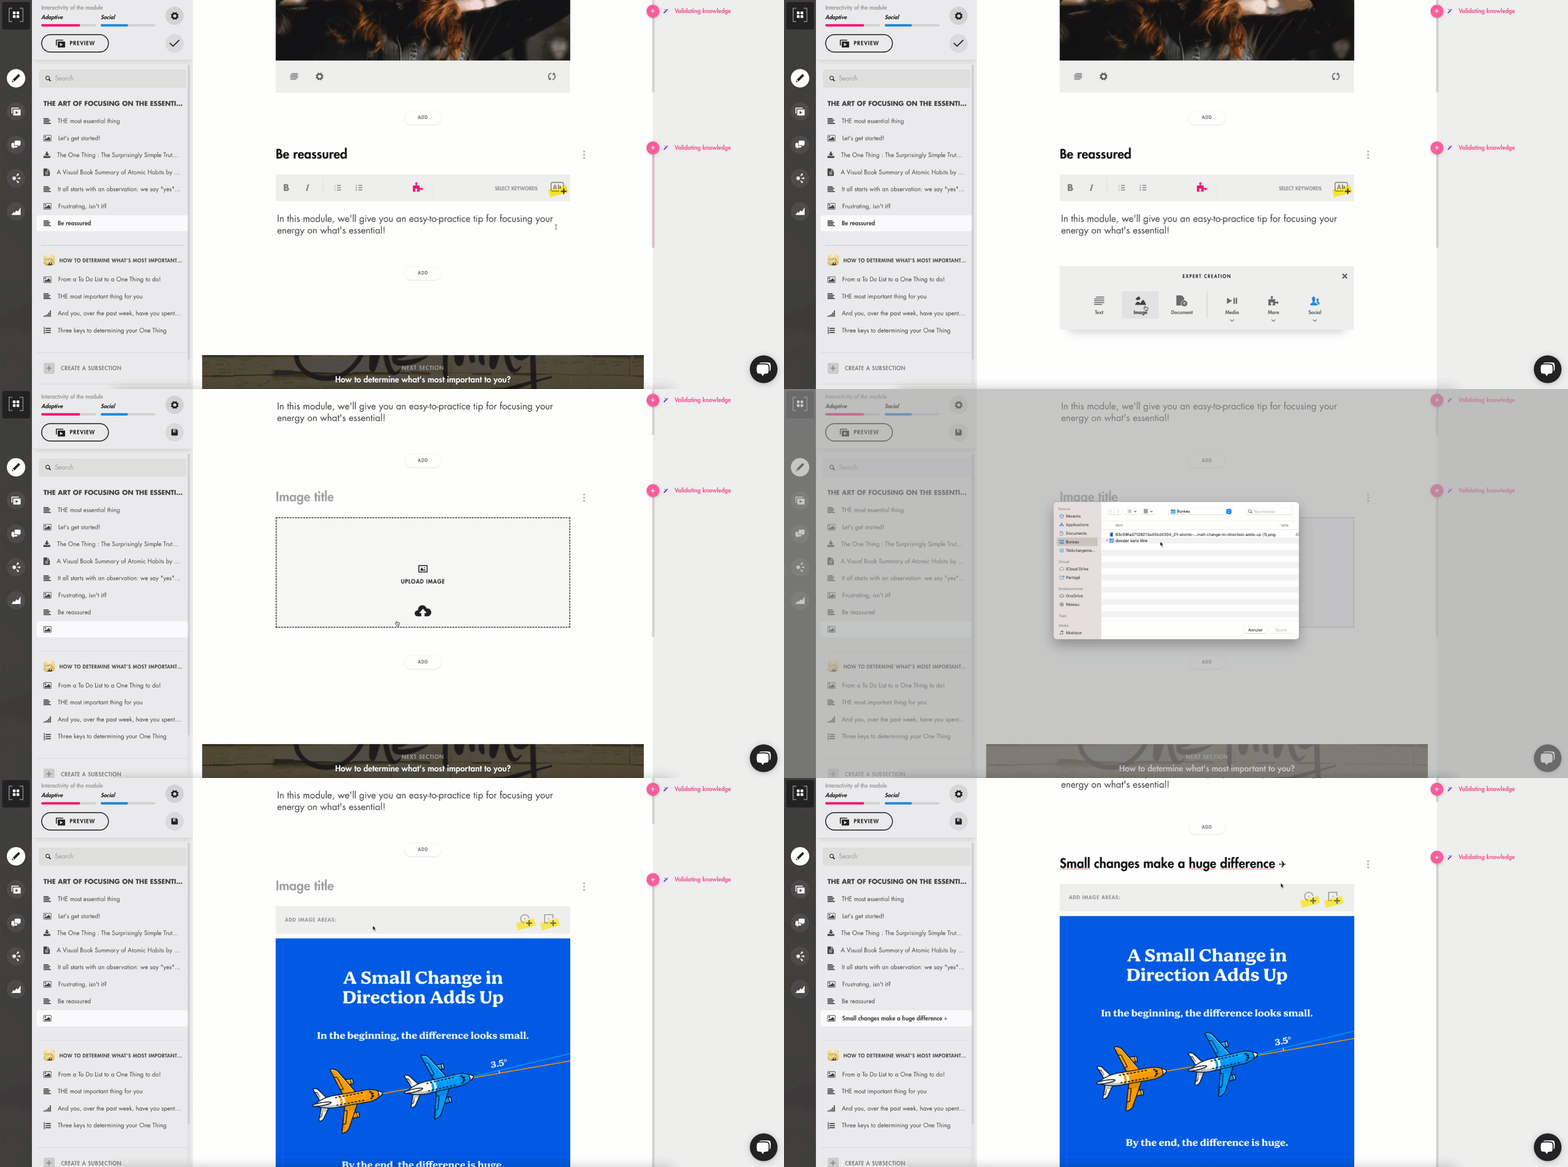
Click on the image to open it in a new tab

To optimize the rendering of your visuals, favor good quality images or screenshots, of a size between 980 and 1600 pixels wide. Beyond this dimension, Teach Up will rework the image to reduce it.
Add a description (optional)
To add a description to your image, follow the steps below:
- Click on the description icon
 at the bottom left of the image.
 - Write or copy and paste the text of your description in the field that opens.
Edit settings
You can enable the full-screen display option for your images.
-
Click the gear icon.
-
Enable the “Display the image in full-screen mode” option.
⚠️ Note: This feature is only available in courses configured as “Sequenced”.
When this option is enabled, the image will automatically appear in full screen when the learner reaches this content.
To continue the course, they must click the “Continue” button located below the image.
Add areas to click on the image (course only)
Clickable areas help highlight the essential elements of your images and allow learners to discover them interactively.
Add a new area to click
To make your images interactive, add clickable areas by following the steps below:
- Click on the zone shape you want to insert: circular
 or rectangular
  .
. - Position the area with the desired size on the image before adding a title and description, if necessary. An area can be resized or moved as desired.
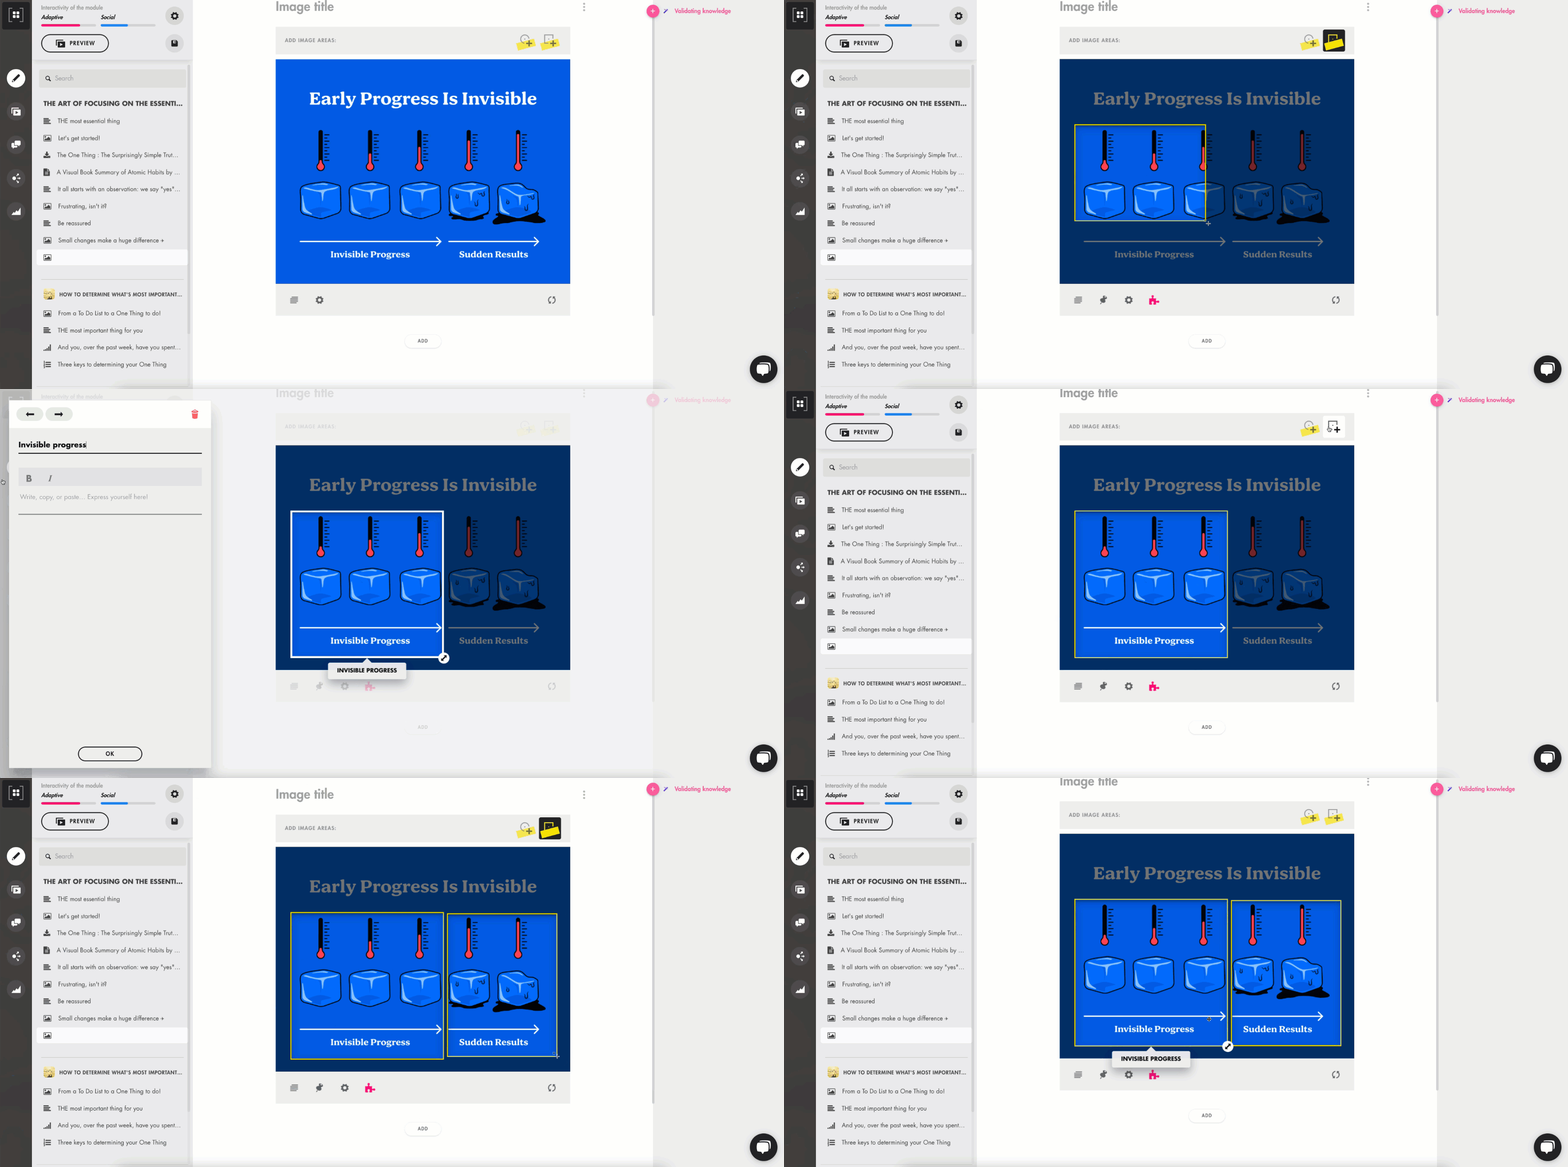
Click on the image to open it in a new tab

Set navigation order between areas
If you have multiple areas to click on an image, you can set the navigation order between these areas by following the steps below:
- Click on the icon in the shape of a pin
 .
. - Activate “Display areas in order”.
- Set the order in which the learner will discover the different zones. By default, display in the order predefined by the author is disabled, allowing the learner to view the areas in any order.
Activate intro games (course only)
Configure intro games
Once your image and zones are created, you can configure intro games to engage your learners by following the steps below:
- Click on the “Puzzle” icon
 under your image to open the intro games pane.
 - Enable the option “Autogenerate interactive exercises”.
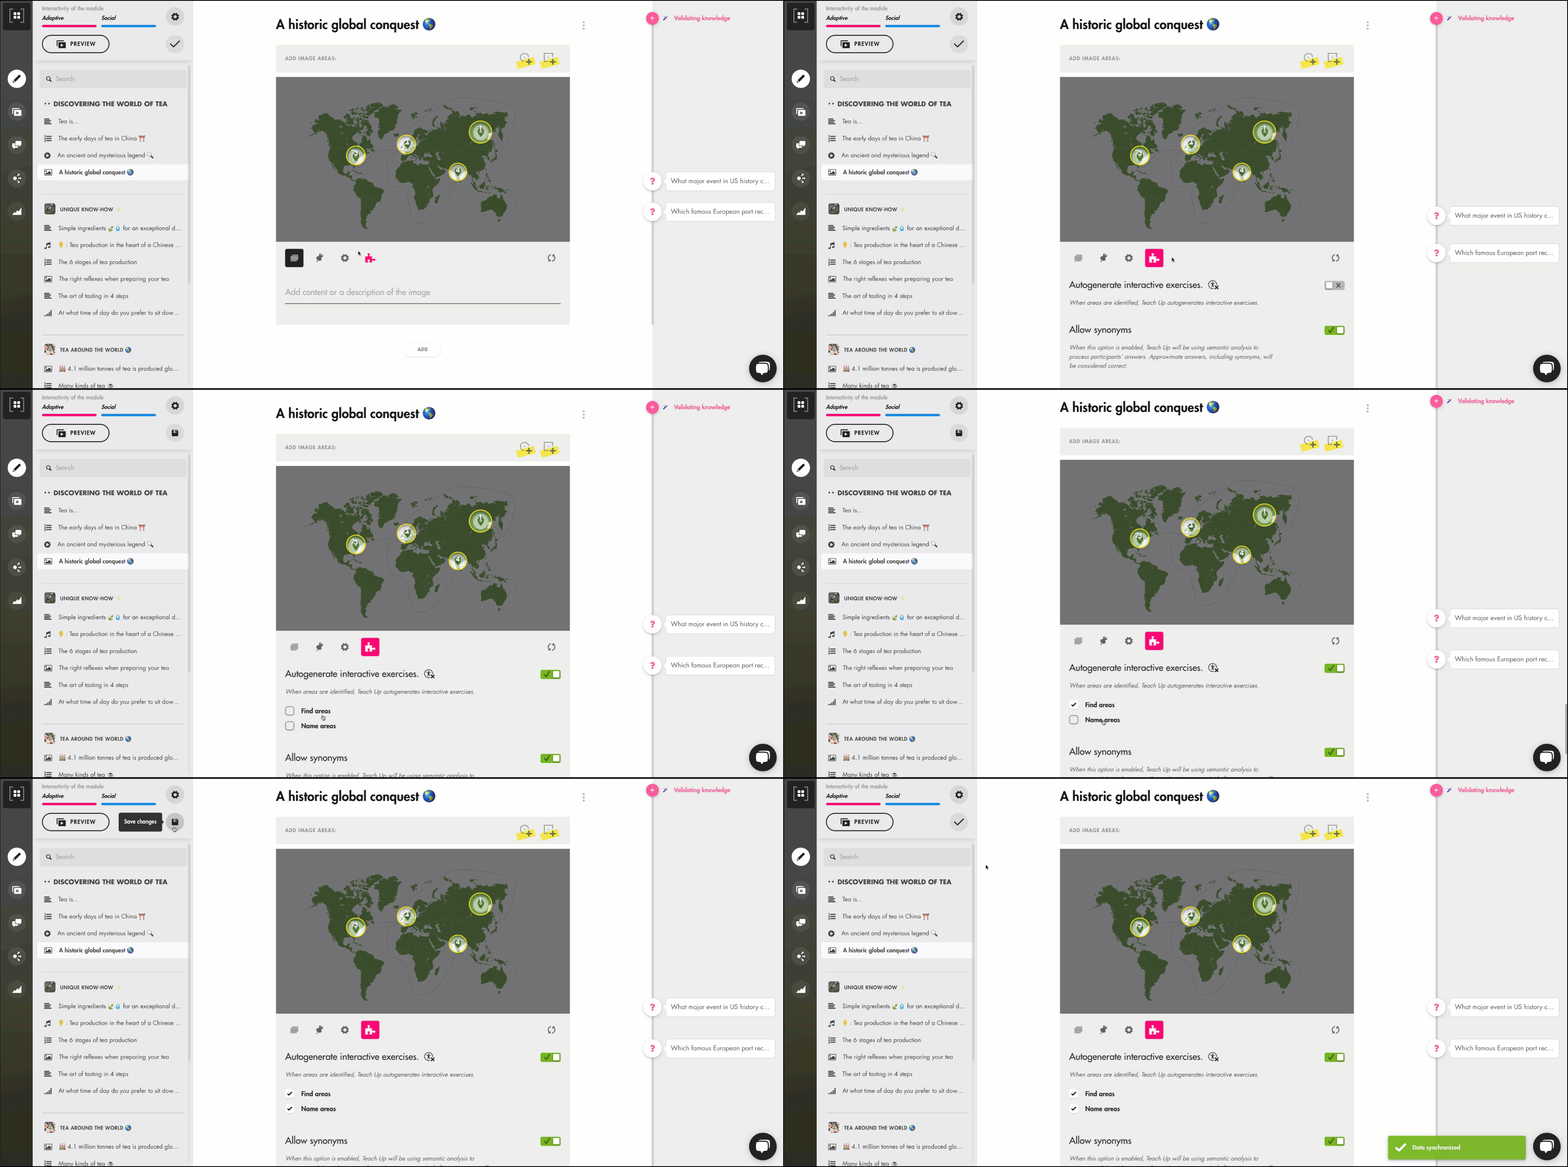
Click on the image to open it in a new tab
- Select the intro game you want to use:
- “Find areas” : The learner must find an area on the image and click on it.
- “Name areas” : The learner must name the area that Teach Up indicates to them on the image.
Note: by default, the thesaurus is enabled. Teach Up will accept answers close to the term to be found in the “Name areas” game.

Find the explanation and rendering of intro games on an image in this article.
Replace an existing image
If you need to replace an existing image, follow the steps below:
- Click on the circular arrow
 at the bottom right of your image.
 - Select the new image that you want to use instead of the old one.
- Check that the clickable areas and descriptions are positioned correctly on the new image, especially if its dimensions are different from those of the old image.
Frequently asked questions
Is it possible to insert images in GIF format?
Yes, it is entirely possible to integrate images in .gif format into a course or an assessment.
What image formats are accepted in a course or assessment?
The image formats accepted within a course or an assessment are as follows: *.png,*.jpg,*.jpeg,*.jpe,*.jp2,*.gif,*.bmp,*.tiff,*.tif,*.svg,*.xcf,*.jfif,*.ico,*.cur,*.map,*.psd,*.avif,*.webp
What are the recommended sizes and dimensions for images embedded in a course or assessment?
To optimize the rendering of your visuals, choose good quality images or screenshots, with a size between 980 and 1600 pixels wide. Beyond this dimension, Teach Up will rework the image to reduce it.
Can I add an audio file (sound) to an image?
Yes, you can add an audio file (sound) and then associate it with an image. Simply add the audio first, then follow the steps to link an illustration image to it.